Using Media Content in OppiaMobile Courses
When a user installs a course containing media content (audio/video), the actual media aren’t included in the course download content. The reason for this is that media files tend to be very large and users on slow connections are unlikely to be able to download large media files.
If a course contains media files that aren’t available on the users phone, on the app homepage a message will appear that some media content is missing.
Optimize your media
Users viewing videos on a 4 or 5 inch screen generally don’t need really high quality as you may want to use if projecting the video. At Digital Campus, we usually convert videos into .m4v format using Handbrake (https://handbrake.fr/ - an open source tool and works on most platforms)
Supported media types
Although Moodle may allow you to upload a wide variety of media types, these might not all be natively supported on Android devices. The current list of supported media types in the Oppia app:
Video
.m4v, .mp4 (MIME format: video/m4v, video/mp4)
.3gp, .3gpp (MIME format: video/3gp, video/3gpp)
Audio
.mp3 (MIME format: audio/mpeg)
If there are other formats for video or audio content that you’d like to include as supported formats then please let us know, confirming that they will play on a native version of Android.
How to embed media files in OppiaMobile courses
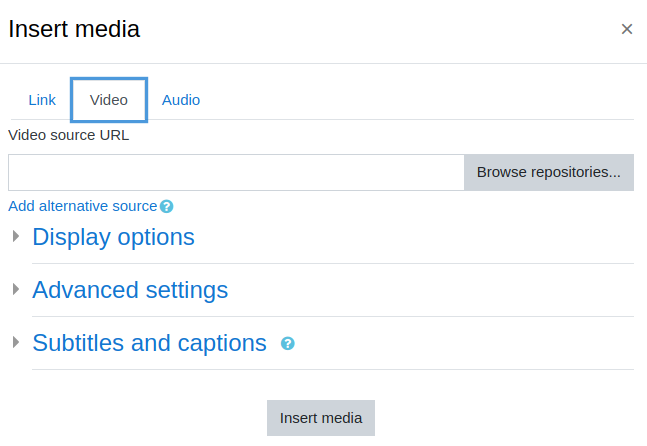
On the page content you are editing, use the upload media button in the Moodle page text editor:

From the pop-up window, select the ‘Video’ tab, then click the ‘Browse repositories’ button:
Then select ‘Upload a file’:
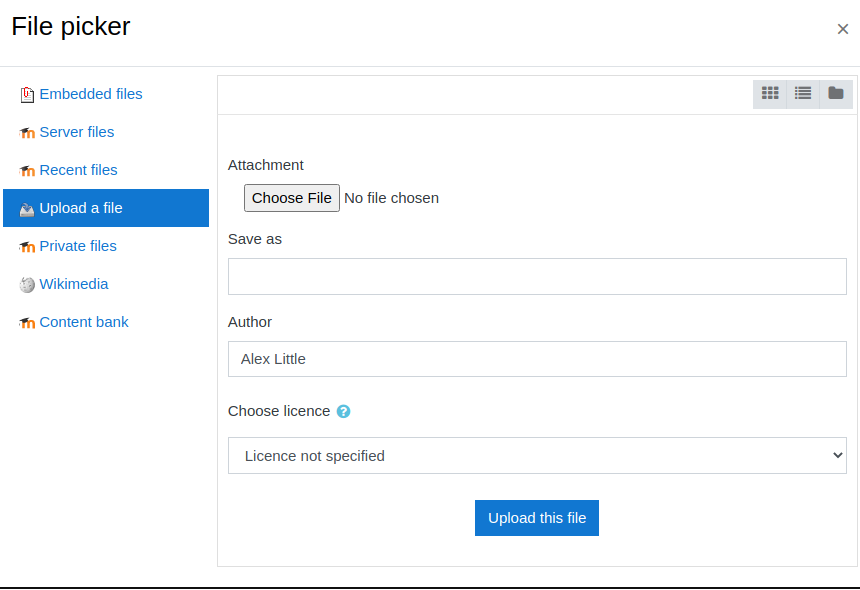
Choose the file to upload and click ‘Upload this file’
To add a
poster/thumbnailimage to your video (this is the image that users will see in the Oppia app and will click on to start the video), select ‘Display Options’ and upload a poster/thumbnail of the video: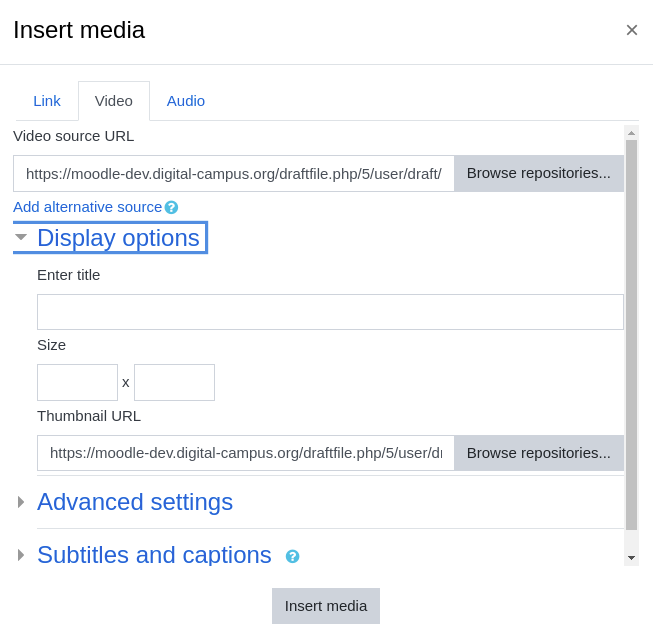
Then click on the ‘Insert Media’ button
The export process will automatically handle uploading the media to the Oppia server
Note
If you don’t add a poster/thumbnail when you upload the video, on
exporting to Oppia you will see a warning message and in the app just a text
link to ‘Play video’ will appear, rather than an image.
How can users get the media files
There are two options for getting the media content onto users phones:
Download the media files directly onto the users SD card. This is most likely the best option for projects which are providing phones to users as the video files can be pre-loaded
Download via the app. When the app flags up that a video file is missing, then the user can download directly to their phone. This is only likely to be feasible to users who are connected to wifi. So by default users will only be able to download video files directly if they are connected to a wifi network. This can be overridden in the app settings to allow downloading of video files by allowing downloading using cellular network.